
This entry is part of a series of tips I am creating as I make my game.
You can use Bolt for free by downloading it from the Asset Store.
Details
What we need: Idle/Walk/Run animations that are based on the speed a A.I. character is moving.
Input: The Animator, Nav Mesh Agent, and blendtree with animations for the character in question. (In this case Idle, Walk, and Run.)
Output: A float value that will represent the character’s speed. This will be used by the blendtree to ‘blend’ between idle, walk, and run.
How this saves you time: You can extend this to any animation variable that is based on physics; for example, detecting when a character is falling and setting a ‘falling’ animation variable bool to true. In that example, the characters velocity would be vertical instead of horizontal.
Summary: Lets say you have three animations: idle, walk, and run. You want to blend seamlessly between them using a single variable for speed on a horizontal plane (read up on blendtrees; you can add the third dimension for more complex animations!). We find speed using the magnitude of the velocity of the Nav Mesh Agent.
Output
As speed increases, the character smoothly transitions from idle to walk to run. As speed decreases, the character smoothly transitions back to walk and then idle. This is all speed based, so no complicated animation logic required.
How to Implement
- Setup your blendtree.
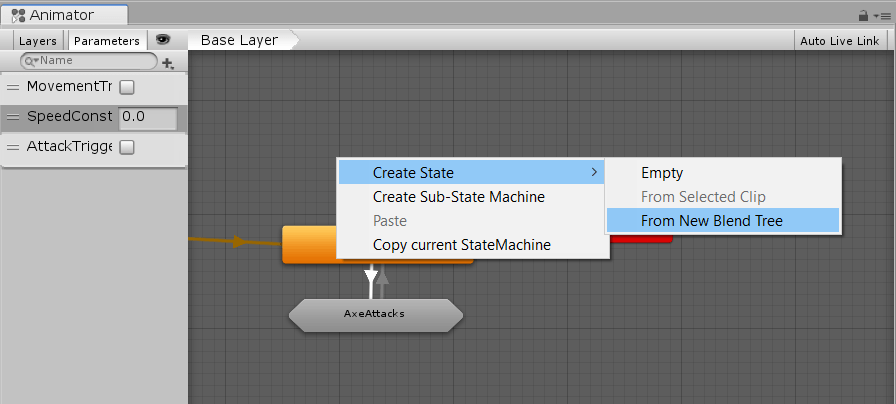
First, make a blendtree in your Animator. You should also add the SpeedConstant animation parameter if you don’t have a variable representing the speed this character is moving yet.

Double click on your new blend tree. Now click it again. You should see this field.
Blend type: 1D, which stands for 1 Dimension. If you want to learn more about dimensions, check this out.
Parameter: SpeedConstant (You may need to create the parameter)

Click the ‘+’ symbol and ‘Add Motion Field. Do this three times, once for Idle, Walk, and Run.
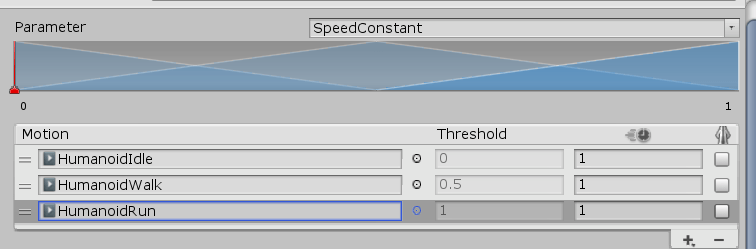
Add your animations to the ‘Motion’ column. You can leave Automate Thresholds on or turn it off and adjust the ‘Threshold’ column as needed (the button for Automate thresholds is right under the Motion column.
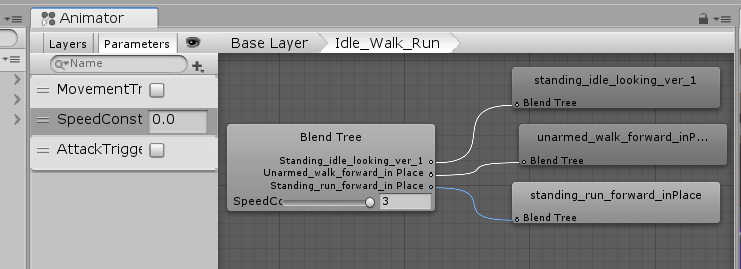
This is what your blendtree should look like in the Animator once you are done. SpeedConstant is the value we will be calculating.
2. Now for Bolt! Because we are dealing with a Navmesh Agent, we can directly access the agents current velocity. We can then use that velocity to calculate the speed.

You will need two Flow Variables: this_Characters_Animator which will be an Animator object, and this_Characters_Navmesh_Agent which will be the Navmesh Agent you are using for your A.I. (Usually attached to the Root Transform of your character).
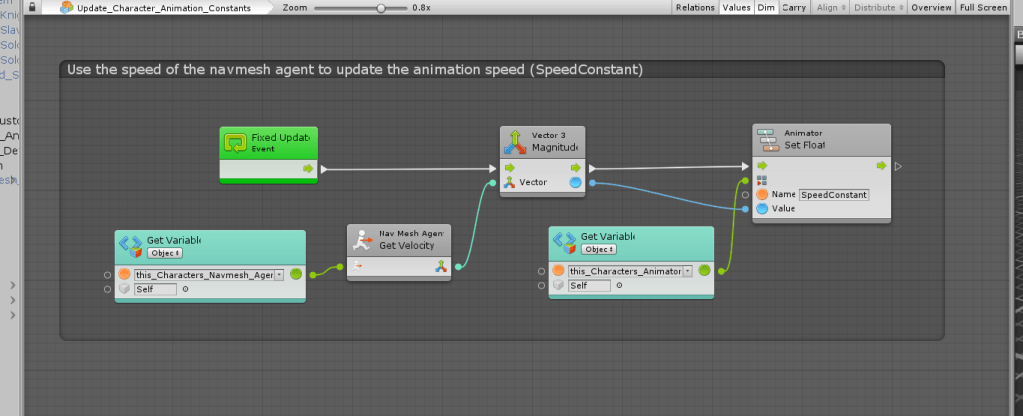
Finally, the logic for Bolt. If you are having issues finding the variables when you are looking at your Bolt logic, you may need to check the type of variable you are grabbing; in this tutorials case, we needed Get Variable (Object).
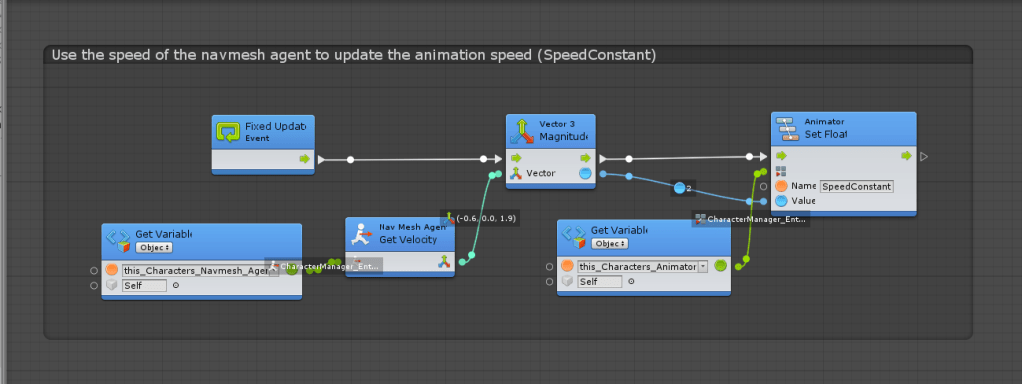
What Bolt should look like running. You can use this to diagnose any issues as Bolt has the nifty feature of allowing you to see the values on the graph lines connecting the boxes.
